 Save
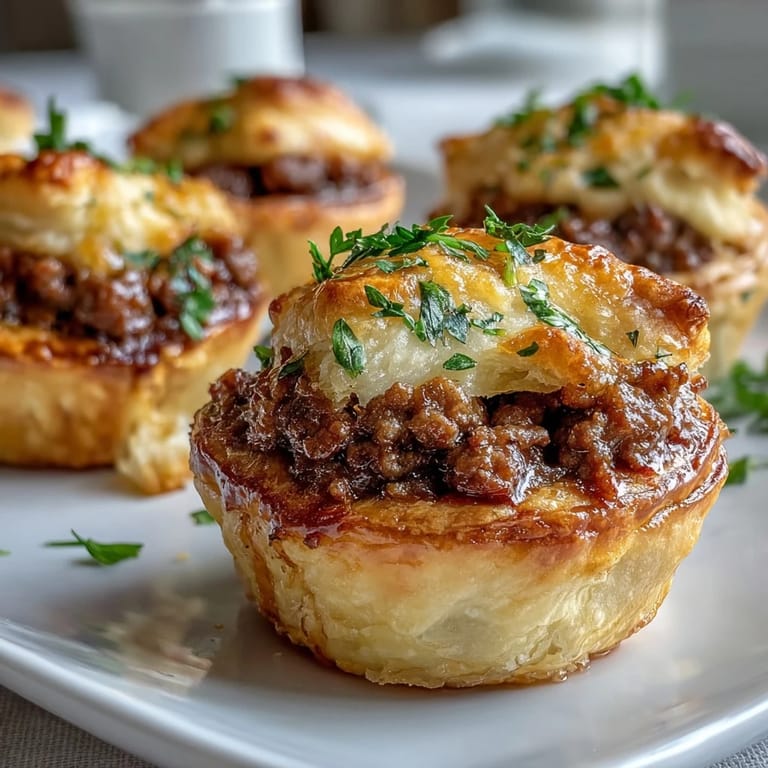
Save The scent of cinnamon and clove drifting through the house on a cold December afternoon is what I associate most with these little pastries. My neighbor brought a tray over one year after a holiday party, and I couldn't stop eating them. The buttery pastry crumbled perfectly against the warm, spiced beef, and I knew I had to figure out how to make them myself. It took a few tries to get the dough tender enough and the filling balanced just right, but now they're my go-to whenever I need something impressive that actually tastes like effort.
I made these for a potluck once, and they disappeared so fast I barely got one for myself. Someone asked if I'd ordered them from a bakery, which felt like the highest compliment. Since then, I've learned to double the batch and hide a few in the back of the fridge before serving. They reheat surprisingly well, and honestly, they taste even better the next day when the spices have had time to settle into the pastry.
Ingredients
- Cream cheese (225 g): This is what makes the pastry so tender and rich, softened just enough to blend smoothly with the butter without turning greasy.
- Unsalted butter (225 g): Cold and diced, it creates those flaky layers when worked gently into the flour, so don't let it warm up too much.
- All-purpose flour (2 cups): The structure of the pastry, but handle it lightly or it will toughen up and lose that melt-in-your-mouth quality.
- Salt (1/2 tsp for pastry): Balances the richness of the cream cheese and butter, bringing out the subtle flavors in every bite.
- Ground beef (450 g): The hearty base of the filling, browned until just cooked through so it stays moist and flavorful.
- Onion (1 small, finely chopped): Adds sweetness and depth to the beef, and cooking it until translucent makes all the difference.
- Garlic (1 clove, minced): Just enough to add a savory note without overwhelming the warm spices that define this filling.
- Ground allspice (1/2 tsp): The secret to that cozy, festive flavor, it ties the cinnamon and cloves together beautifully.
- Ground cinnamon (1/2 tsp): Adds warmth and a hint of sweetness that complements the beef in a way that feels traditional and comforting.
- Ground cloves (1/4 tsp): A little goes a long way, bringing a deep, aromatic quality that makes the filling unforgettable.
- Dried thyme (1/2 tsp): Earthy and subtle, it rounds out the spice blend and keeps the filling from tasting too sweet.
- Salt and black pepper (1/2 tsp and 1/4 tsp): Essential for bringing all the flavors into focus and making sure the filling doesn't taste flat.
- Beef broth (1/4 cup): Keeps the filling moist and adds a savory richness, simmered down until it's just absorbed.
- Fresh parsley (1 tbsp, chopped): A bright, fresh finish that lightens the richness of the beef and spices.
- Unsalted butter (1 tbsp for filling): Used to sauté the onion and garlic, adding another layer of richness to the base.
- Egg (1, beaten): Brushed on top for that golden, glossy finish that makes these look as good as they taste.
Tired of Takeout? 🥡
Get 10 meals you can make faster than delivery arrives. Seriously.
One email. No spam. Unsubscribe anytime.
Instructions
- Mix the Pastry:
- Blend the softened cream cheese and cold butter until smooth, then gently work in the flour and salt until a soft dough forms. Divide it in half, flatten into disks, wrap tightly, and chill for at least 30 minutes so it firms up and becomes easy to roll.
- Cook the Filling:
- Melt the butter in a skillet, cook the onion until soft and translucent, then add the garlic and ground beef, breaking it up as it browns. Stir in the spices, pour in the broth, and simmer until the liquid is mostly gone, then stir in the parsley and let it cool completely.
- Prepare for Baking:
- Preheat your oven to 200°C (400°F) and line two baking sheets with parchment paper so the pastries don't stick.
- Roll and Cut:
- Roll out the chilled dough on a floured surface to about 3 mm thick, then cut out 7 cm rounds and place half of them on the prepared sheets.
- Fill and Seal:
- Spoon a heaping teaspoon of the cooled beef filling onto each round, brush the edges with a little water, top with another round, and press the edges firmly with a fork to seal. Brush the tops with beaten egg and cut a small slit in each one to let steam escape.
- Bake Until Golden:
- Bake for 18 to 22 minutes, watching for a deep golden color on top. Let them cool slightly before serving so the filling sets and doesn't spill out.
 Save
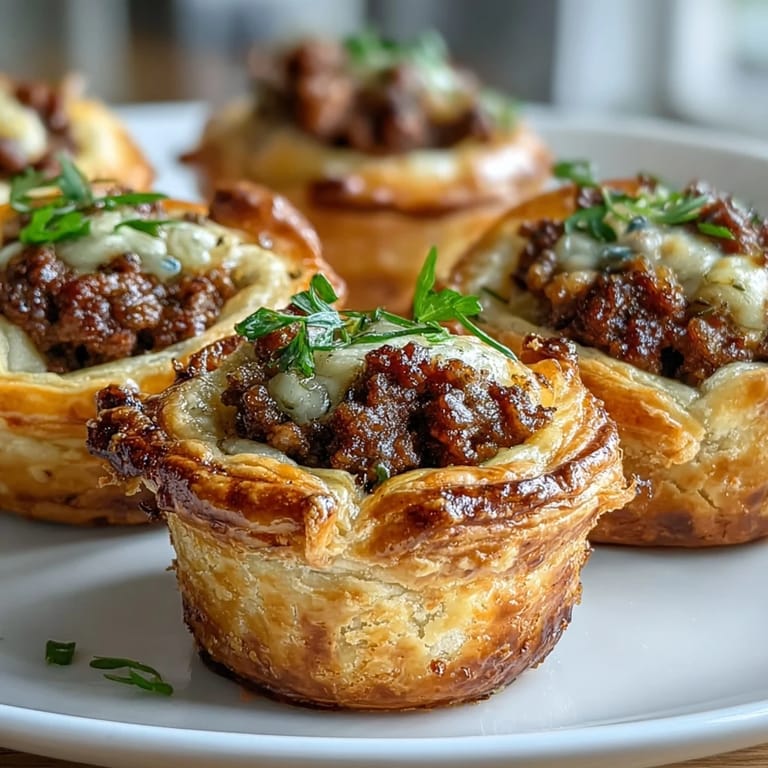
Save The first time I served these at a family gathering, my uncle asked for the recipe before he'd even finished his second one. That moment made me realize how something so small can carry so much flavor and feeling. Now, every time I make them, I think of that evening and how food has a way of bringing people together without anyone having to say much at all.
Making the Pastry Ahead
I've learned that making the dough a day or two in advance actually improves the texture, giving the flour time to fully hydrate and the butter to firm up evenly. Wrap it tightly in plastic wrap and keep it in the fridge until you're ready to roll. If you're planning a big event, you can even freeze the dough for up to a month, just let it thaw overnight in the fridge before using.
Serving Suggestions
These little tourtières are incredible on their own, but pairing them with a tangy cranberry chutney or a sharp Dijon mustard takes them to another level. I've also served them with a simple green salad when I want them to feel more like a light meal than an appetizer. They're just as good warm from the oven as they are at room temperature, which makes them perfect for parties where you need things to sit out for a while.
Storing and Reheating
Leftover tourtières keep well in an airtight container in the fridge for up to three days, and reheating them in a 180°C (350°F) oven for about 10 minutes brings back that crisp, flaky texture. You can also freeze them after baking, then reheat straight from frozen, adding a few extra minutes to the oven time. If you want to freeze them unbaked, assemble them completely, freeze on a tray, then transfer to a bag and bake straight from frozen, adding 5 to 7 minutes to the baking time.
- Let them cool completely before storing to prevent soggy pastry.
- Reheat in the oven, not the microwave, to keep the crust crisp.
- Label frozen batches with the date so you remember how long they've been stored.
 Save
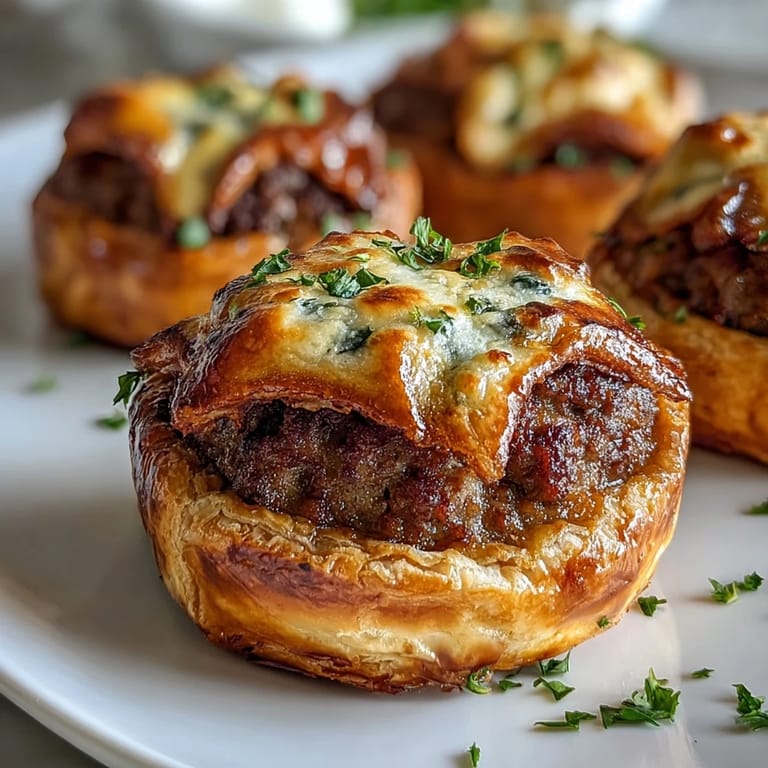
Save There's something deeply satisfying about pulling a tray of these golden little pastries out of the oven and watching people's faces light up when they take the first bite. Make them once, and I promise they'll become part of your regular rotation.
Recipe FAQs
- → Can I make the pastry dough ahead of time?
Yes, the cream cheese pastry can be prepared up to 2 days in advance and stored in the refrigerator, wrapped tightly in plastic wrap.
- → What makes tourtière filling different from regular meat pies?
Traditional tourtière features warm spices like allspice, cinnamon, and cloves that give it a distinctive aromatic quality unique to Quebec cuisine.
- → Can I freeze these before or after baking?
You can freeze unbaked tourtières on a tray, then transfer to freezer bags. Bake directly from frozen, adding 5-7 minutes to the cooking time.
- → What are the best accompaniments for serving?
Cranberry chutney, Dijon mustard, or a tangy fruit preserve complement the spiced beef filling beautifully and add festive color to your platter.
- → Can I substitute the ground beef with other meats?
Absolutely. Ground pork, veal, or a combination of meats work wonderfully and are traditional variations in Quebec tourtière preparations.
- → Why is my pastry tough instead of flaky?
Overworking the dough develops gluten, making it tough. Mix just until combined and keep the butter cold for the flakiest results.