 Save
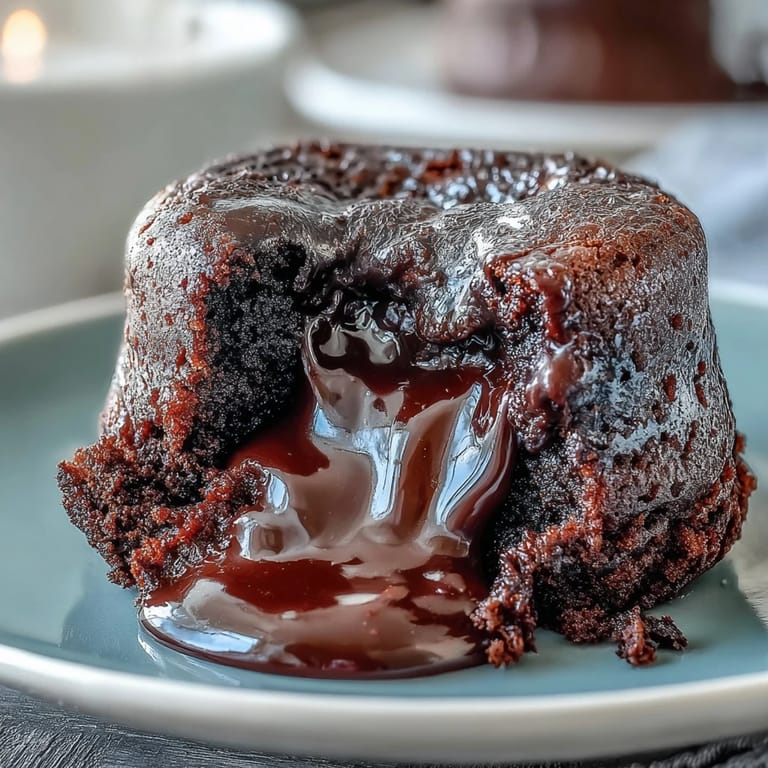
Save I used to think molten chocolate cakes were some kind of pastry magic reserved for restaurants with fancy plating tweezers. Then one rainy Tuesday, I cracked the code in my own kitchen with four ramekins and a hunch about espresso. The first time I inverted one onto a plate and watched that glossy center spill out, I actually laughed out loud. It felt like pulling off a delicious trick, and I've been hooked ever since.
I made these for my sister's birthday once, and she still brings it up every year. She's not easily impressed, but watching her crack into that center with a spoon and go quiet for a second told me everything. We ate them with vanilla ice cream melting into the warm chocolate, and the kitchen smelled like a European cafe. That night, this dessert stopped being just a recipe and became my go to move when I want to make someone feel special.
Ingredients
- Bittersweet or semisweet chocolate (115 g): This is the soul of the cake, so use something you'd actually enjoy eating on its own, nothing waxy or too sweet.
- Unsalted butter (115 g plus extra for greasing): It gives the batter that silky richness and helps create the molten center, plus greasing the ramekins well is non negotiable for a clean flip.
- Large eggs (2) and egg yolks (2): The yolks add luxurious texture while the whole eggs provide structure, this combo is what makes the center stay gooey.
- Granulated sugar (100 g): Just enough sweetness to balance the dark chocolate without making it cloying.
- All purpose flour (30 g): A tiny amount holds everything together without turning it into actual cake, measure carefully.
- Instant espresso powder (1 tsp): This is my secret weapon, it makes the chocolate taste more like itself, deeper and almost mysterious.
- Pure vanilla extract (1 tsp): A warm note that rounds out the bittersweet edge.
- Pinch of salt: Never skip it, salt makes every flavor sharper and more alive.
Tired of Takeout? 🥡
Get 10 meals you can make faster than delivery arrives. Seriously.
One email. No spam. Unsubscribe anytime.
Instructions
- Prep the ramekins:
- Preheat your oven to 220°C (425°F), then generously butter four 170 ml ramekins and dust them with cocoa powder, tapping out the excess like you're preparing tiny stage sets. This step is what lets you invert them later without a mess.
- Melt the chocolate and butter:
- Set a heatproof bowl over a pan of barely simmering water and melt the chocolate and butter together, stirring until it's glossy and smooth. Let it cool for a few minutes so it doesn't scramble the eggs later.
- Whisk the eggs and sugar:
- In a separate bowl, whisk the eggs, egg yolks, and sugar together for about 2 to 3 minutes until the mixture is pale, thick, and leaves ribbons when you lift the whisk. This aeration is part of what gives the cakes their tender crumb.
- Add espresso and vanilla:
- Stir the espresso powder and vanilla extract into the cooled chocolate mixture until fully dissolved. You'll smell the difference right away, deeper and almost earthy.
- Combine chocolate and eggs:
- Gently fold the chocolate mixture into the egg mixture using a spatula, working in wide sweeps to keep the air you just whipped in. It should look silky and unified.
- Fold in flour and salt:
- Sift the flour and salt over the batter and fold just until you don't see any white streaks, overmixing here will steal the molten magic. Stop as soon as it's combined.
- Fill and bake:
- Divide the batter evenly among the ramekins, place them on a baking sheet, and bake for 11 to 13 minutes until the edges look set but the centers still jiggle slightly when nudged. This is the moment that separates lava from cake, so watch closely.
- Rest and invert:
- Let the cakes rest for exactly 1 minute, then run a thin knife around the edges to loosen and confidently invert each one onto a dessert plate. Serve immediately while the centers are still molten and glorious.
 Save
Save There's something about cracking into one of these cakes that makes people pause and smile, even if they're usually too cool to show it. I've served them at dinner parties and quiet nights in, and every single time, the room gets a little quieter and happier. It's become my love language in dessert form, a way to say you matter without having to find the words.
Serving Suggestions
A scoop of cold vanilla ice cream on top is almost mandatory in my house, the contrast of temperature and the way it melts into the warm chocolate is pure comfort. Whipped cream works too, especially if you sweeten it lightly and add a splash of vanilla. I've also dusted the plates with powdered sugar or added fresh raspberries on the side for a tart pop, but honestly, the cake is so rich it barely needs backup.
Make Ahead Tips
You can prepare the entire batter a few hours ahead, pour it into the ramekins, cover with plastic wrap, and refrigerate until you're ready to bake. Just remember to bring them to room temperature for about 20 minutes before they go in the oven, otherwise the centers stay too cold and won't flow. This trick has saved me more than once when I wanted to look effortlessly put together while hosting.
Customization Ideas
If you want a stronger coffee kick, bump the espresso powder up to 1½ teaspoons, it won't taste like a mocha but it will deepen the chocolate even more. You can also tuck a small square of dark chocolate or a spoonful of Nutella in the center of each ramekin before baking for an extra molten surprise. Some people add a pinch of cinnamon or cayenne to the batter for warmth, and I won't lie, it's pretty fantastic.
- Try orange zest in the batter for a subtle citrus note that cuts the richness.
- Swap the vanilla extract for almond or hazelnut extract if you're feeling adventurous.
- Dust the finished cakes with flaky sea salt for a sweet salty contrast that feels very fancy.
 Save
Save These little cakes have never let me down, and I hope they become your secret weapon too. There's real joy in pulling off something this indulgent with your own two hands.
Recipe FAQs
- → Can I make the batter ahead of time?
Yes, you can prepare the batter a few hours in advance and refrigerate it in the ramekins. Just remember to bring them to room temperature before baking to ensure even cooking and the perfect molten center.
- → How do I know when the cakes are done?
The cakes are ready when the edges are set and firm but the centers still jiggle slightly when gently shaken. This typically takes 11-13 minutes at 220°C (425°F). Overbaking will result in fully cooked centers instead of molten ones.
- → What type of chocolate works best?
Bittersweet or semisweet chocolate with 60-70% cocoa content works best. This provides rich chocolate flavor without being overly sweet. Avoid milk chocolate as it won't give the same depth of flavor.
- → Can I omit the espresso powder?
While you can omit it, the espresso powder enhances the chocolate flavor without making the cakes taste like coffee. If you prefer, you can replace it with an extra ½ teaspoon of vanilla extract.
- → Why do I need to grease and dust the ramekins?
Greasing with butter and dusting with cocoa powder prevents the cakes from sticking, ensuring they release cleanly when inverted. This step is crucial for presenting beautiful, intact molten cakes.
- → What if I don't have ramekins?
You can use muffin tins or small oven-safe cups of similar size (170 ml/6 oz). Just adjust the baking time slightly and watch carefully, as different vessels may conduct heat differently.